Webhook
Use webhooks to be notified about events that happen in your Pagescreen account.
Pagescreen can send webhook events that notify your application or third-party softwares any time a change happens on a webpage you monitor. This is especially useful to keep track of changes on your monitors, and synchronise the new screenshots as they occur.
Each event to notification has an Event object attached, sent vith an HTTP POST request, to any endpoint URLs that you have defined in your account’s Webhooks settings. You can have Pagescreen send a single event to several webhook endpoints.
Change Event
The change Event object contains all the relevant information about your monitor and the change detected, including a direct link to the new screenshot generated.
{
    "event": "change",
    "uuid": "ab996c58-31b9-4d39-a844-4c40ab473271",
    "automation_id": "1",
    "url": "https://pagescreen.io",
    "domain": "pagescreen.io",
    "label": "Pagescreen Test (page title)",
    "created_at": "2022-12-14T09:59:01+0000",
    "change": 9.37,
    "image_permalink": "https://pagescreen.io/i/123.png",
    "view_link": "https://app.pagescreen.io/capture/view/123",
    "compare_link": "https://app.pagescreen.io/capture/compare/123"
}
Capture Event
A capture.new Event object can be sent when a new screenshot is generated. It includes similar information as the REST API capture object:
{
   "uuid":"763eadb9-7c6b-4383-9013-34859e0ab062",
   "event":"capture.new",
   "id":"1",
   "url":{
      "id":"2",
      "url":"https://pagescreen.io",
      "http_code":"200",
      "title":"Pagescreen (test)",
      "description":""
   },
   "permalink":"https://i.pagescreen.io/i/123.png",
   "generated":"1",
   "status":"1",
   "requested_on":"2022-12-14T07:05:10+00:00",
   "last_updated":"2022-12-14T07:05:38+00:00",
   "options":{
      "delay":"0",
      "format":"png",
      "fullpage":"1",
      "viewport":{
         "width":"1440",
         "height":"960"
      }
   },
   "automation_id":"1",
   "file":{
      "width":"1440",
      "height":"11216",
      "size":"639570"
   },
   "colors":{
      "rgb(109, 118, 139)":304,
      "rgb(255, 255, 255)":169,
      "rgb(51, 51, 51)":4,
      "rgba(0, 0, 0, 0)":523,
      "rgb(0, 0, 0)":82,
      "rgb(239, 239, 239)":5,
      "rgb(33, 68, 146)":27,
      "rgb(0, 131, 221)":37,
      "rgb(120, 129, 149)":27,
      "rgba(255, 255, 255, 0.063)":2,
      "rgba(255, 255, 255, 0.314)":2,
      "rgba(255, 255, 255, 0.5)":2,
      "rgb(255, 194, 10)":5,
      "rgb(0, 26, 62)":42,
      "rgb(70, 188, 102)":11,
      "rgb(238, 82, 83)":5,
      "rgb(255, 165, 0)":6,
      "rgb(61, 129, 214)":22,
      "rgb(0, 122, 255)":4,
      "rgb(30, 144, 255)":8,
      "rgb(248, 248, 248)":6,
      "rgb(240, 240, 240)":7,
      "rgb(80, 102, 144)":15,
      "rgba(0, 0, 0, 0.1)":1,
      "rgb(0, 201, 183)":4
   },
   "navigation":{
      "previous":{
         "id":"1"
      },
      "next":null
   }
}
Dropbox
Pagescreen currently let you synchronise your screenshots with Dropbox, when a change occurs, using its webhook system and Zapier.
Integration with Dropbox via Zapier
Zapier will allow you to connect Pagescreen with Dropbox in a few steps. You'll be able to synchronise all the screenshots generated after a change was detected.
-
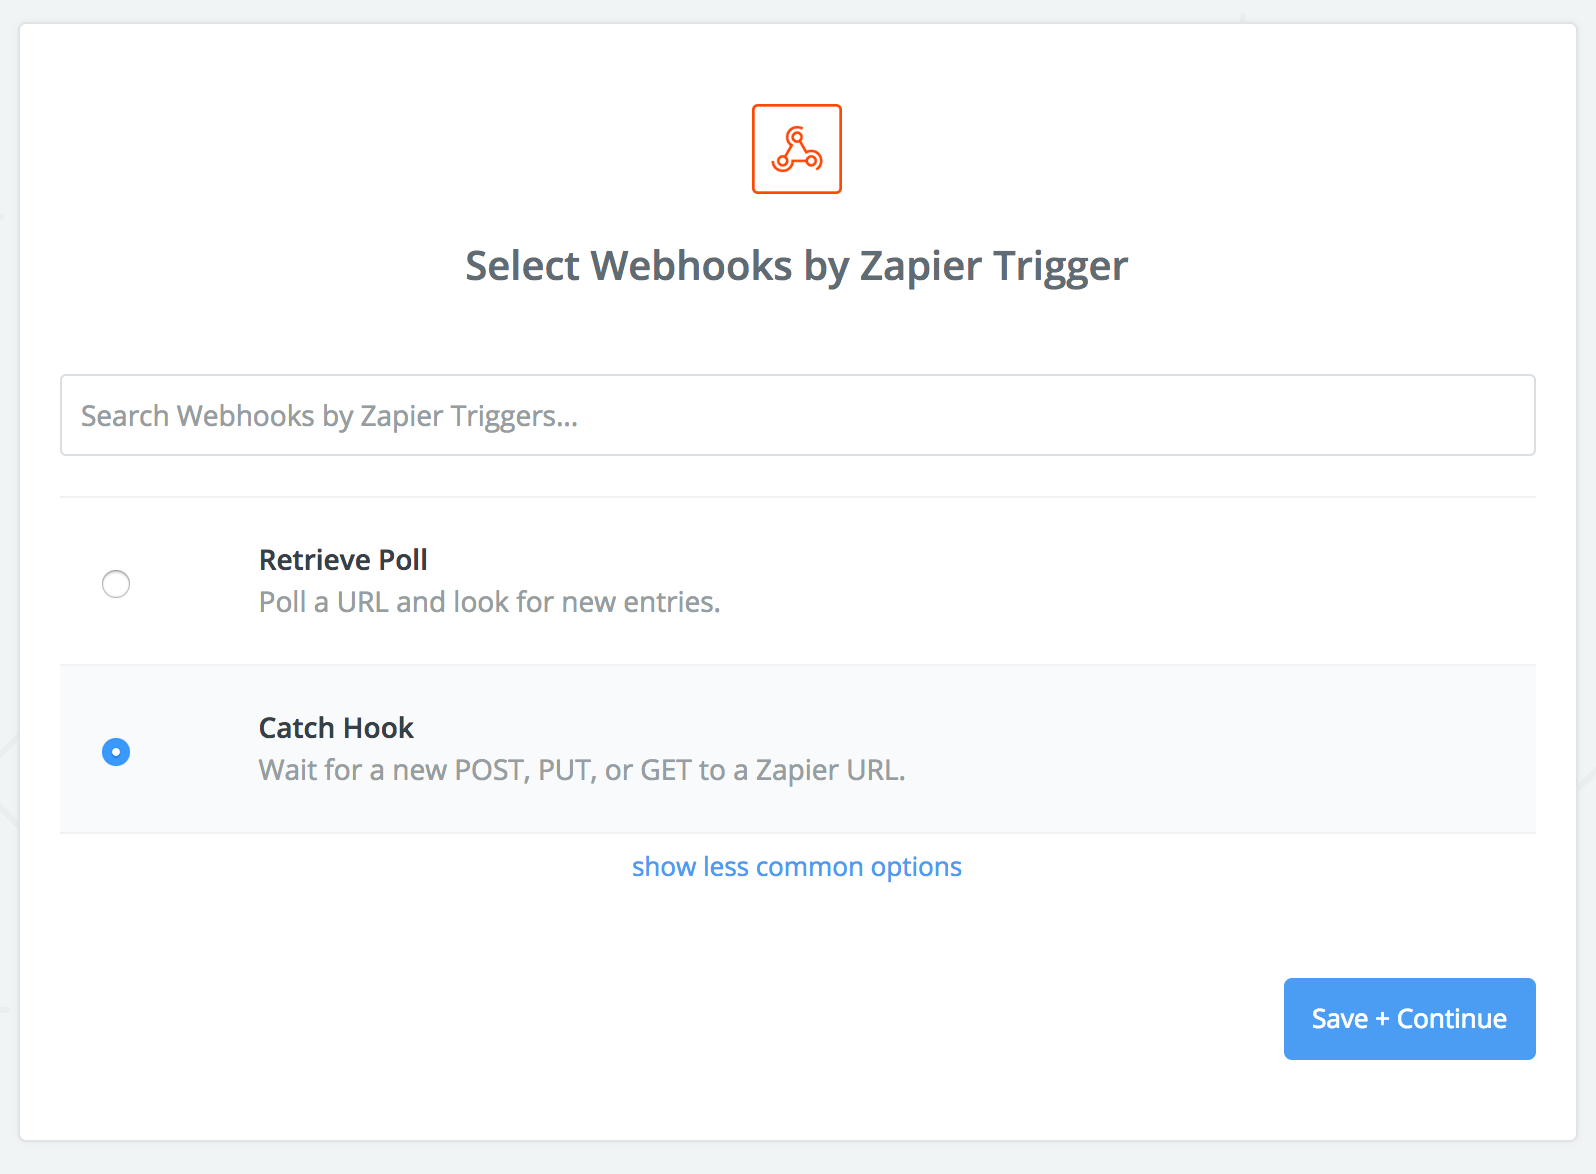
First, connect to your Zapier account and create a new Zap. Select "Webhooks by Zapier" as the trigger App.

-
Zapier will ask you which behavior you would like to setup for the Webhook. Since Pagescreen is pro-active and sends the data as soon as a change is detected, select "Catch Hook".
-
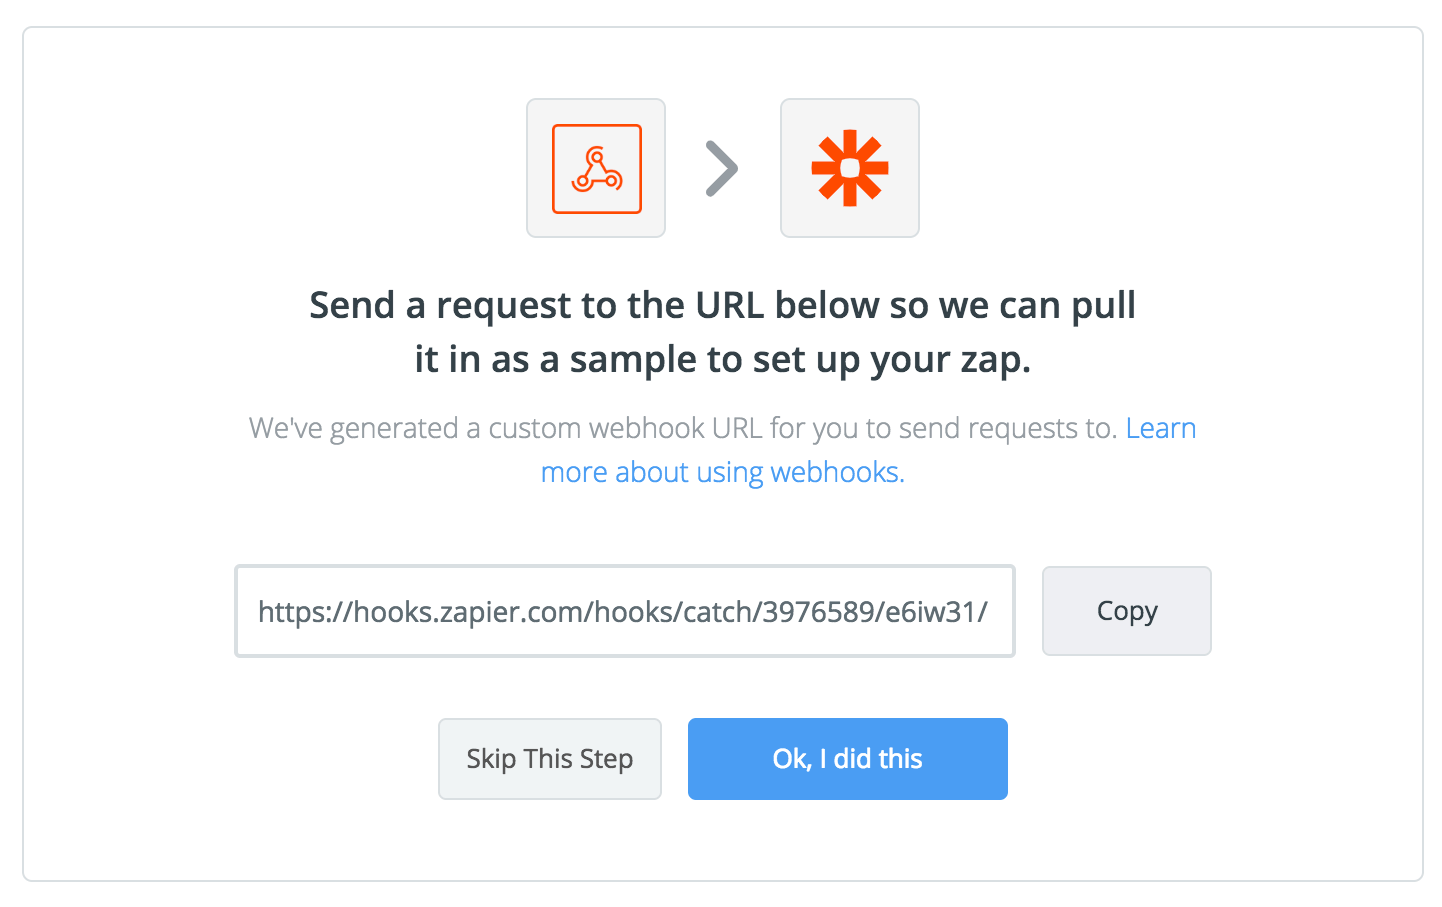
On the next step, no action is required, simply click "Continue".

- At this step, Zapier created a webhook endpoint ready to use. It's time to connect Zapier with Pagescreen by copying the given URL and pasting it to your Pagescreen list of endpoints.
Once done, let Zapier know the connection is done by clicking "Ok, I did this".
-
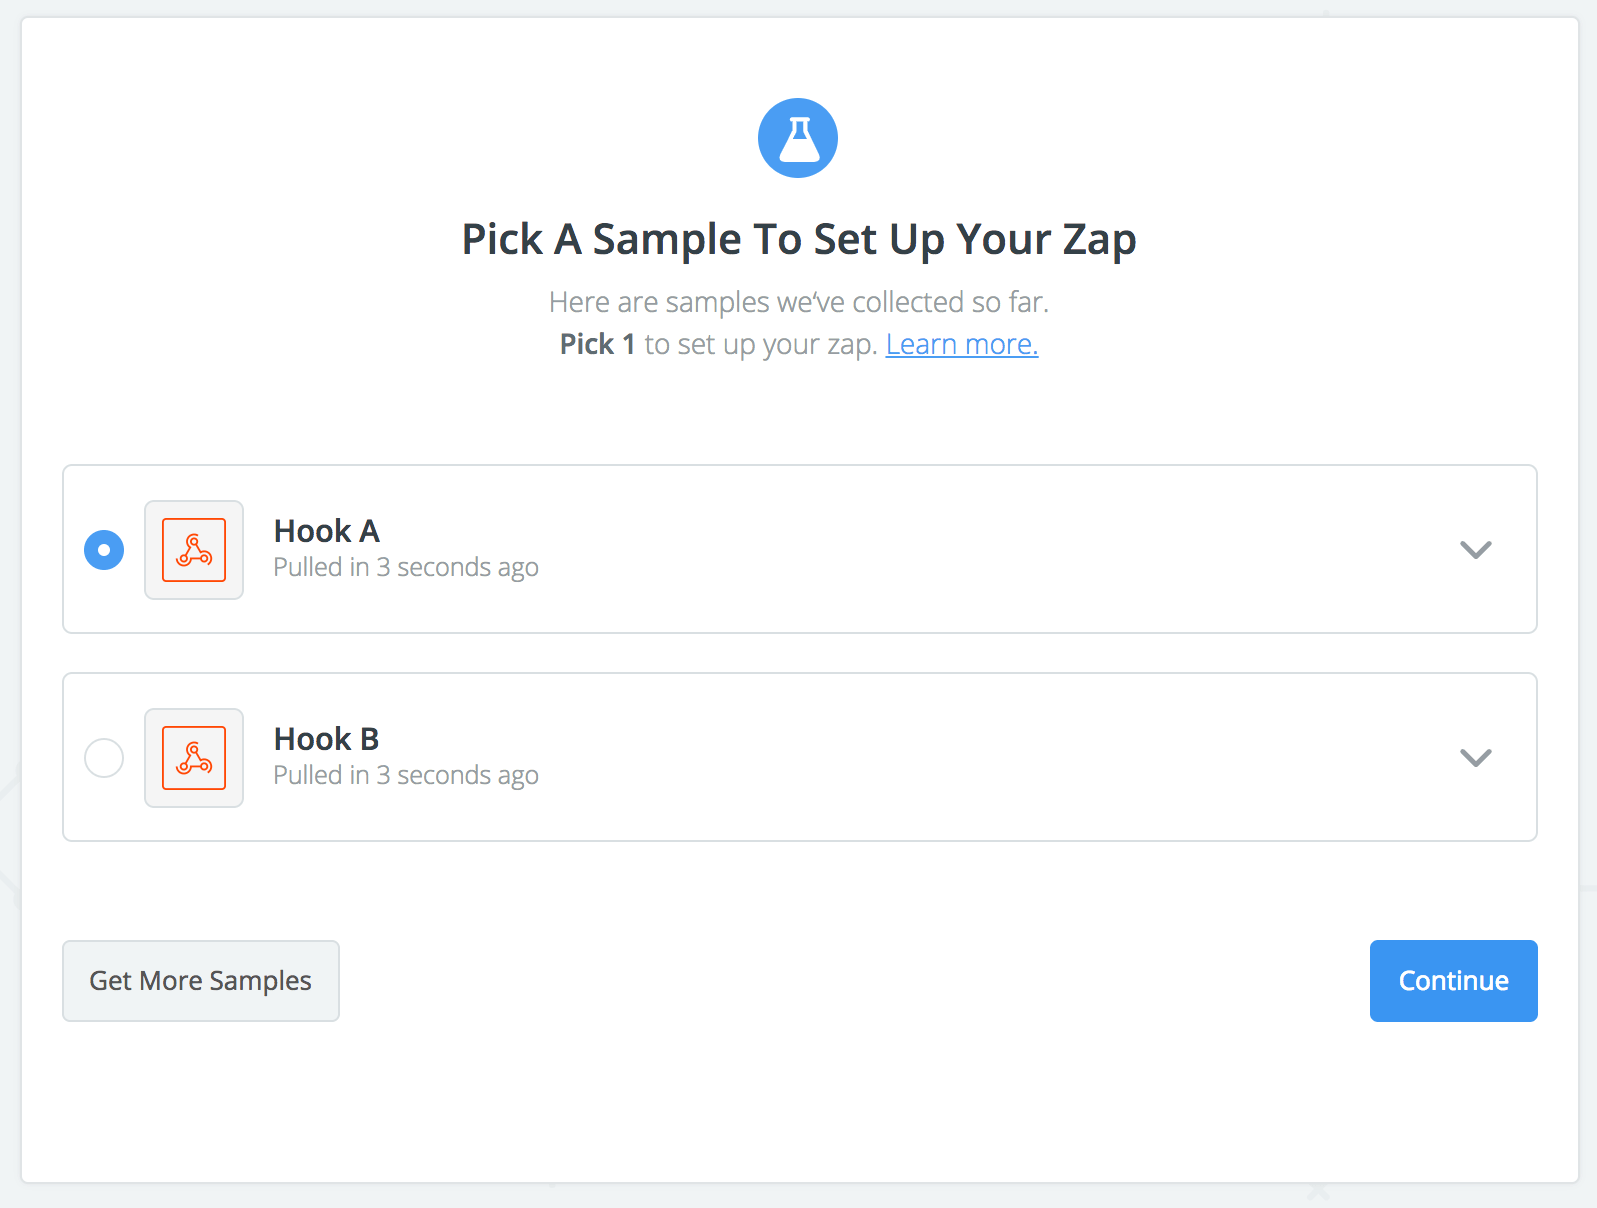
If everything went well, Pagescreen sent a test event to Zapier, and Zapier detected it. Pick any sample hook data that was received and click "continue".
-
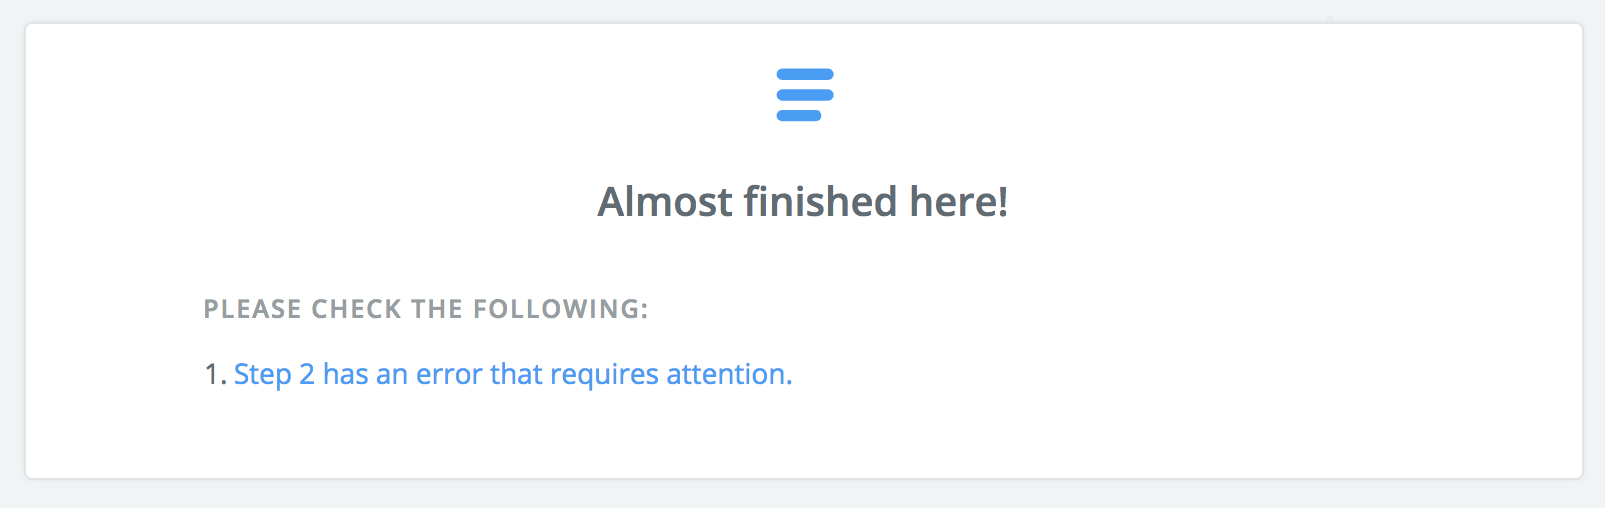
Now that Pagescreen and Zapier are able to communicate, let's connect you Dropbox account. And error might show up at this stage, but no worries, simply follow Zapier's instruction.
-
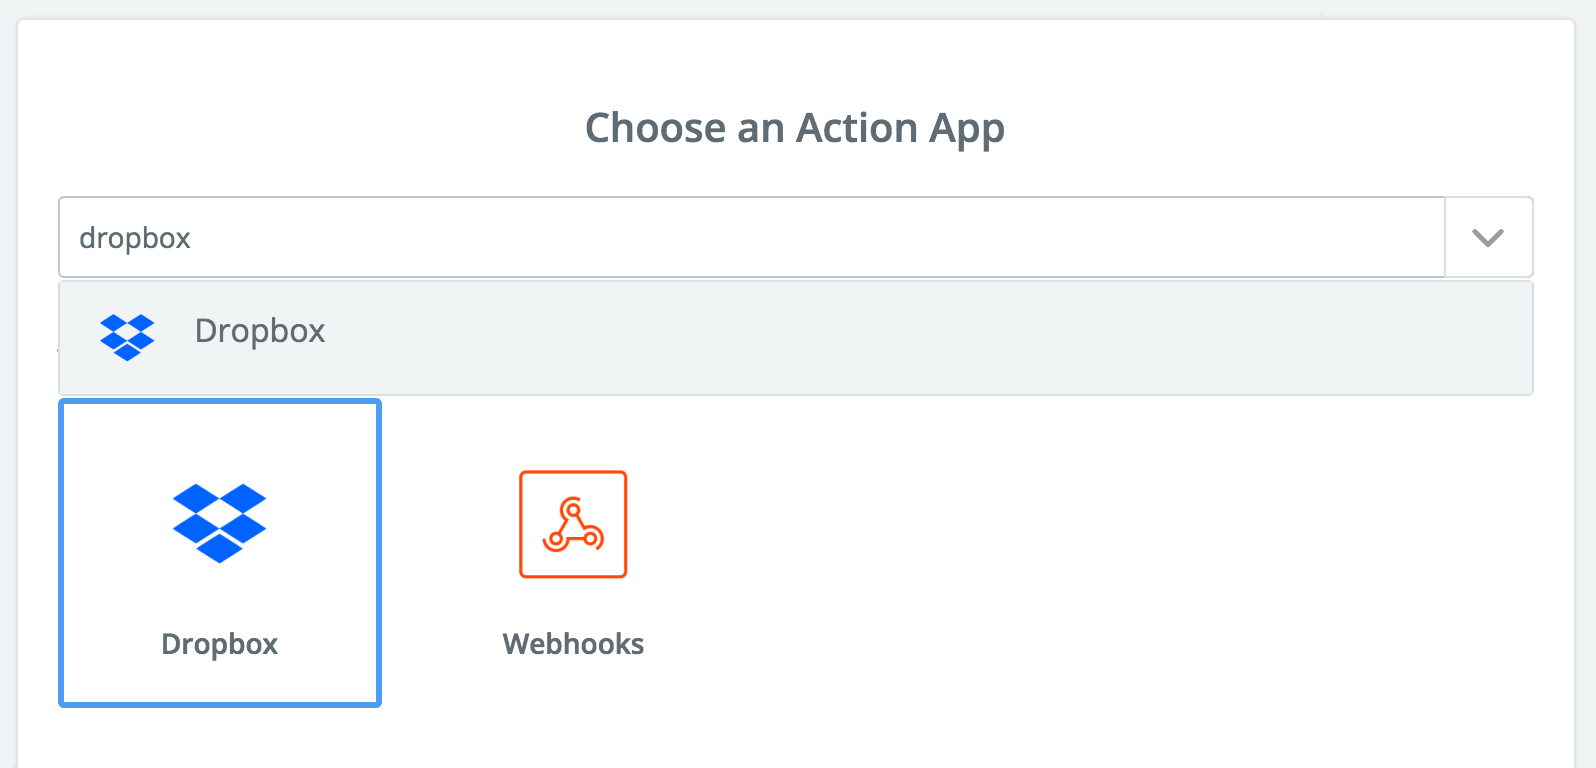
Zapier will ask you to choose an Action App, select "Dropbox".
-
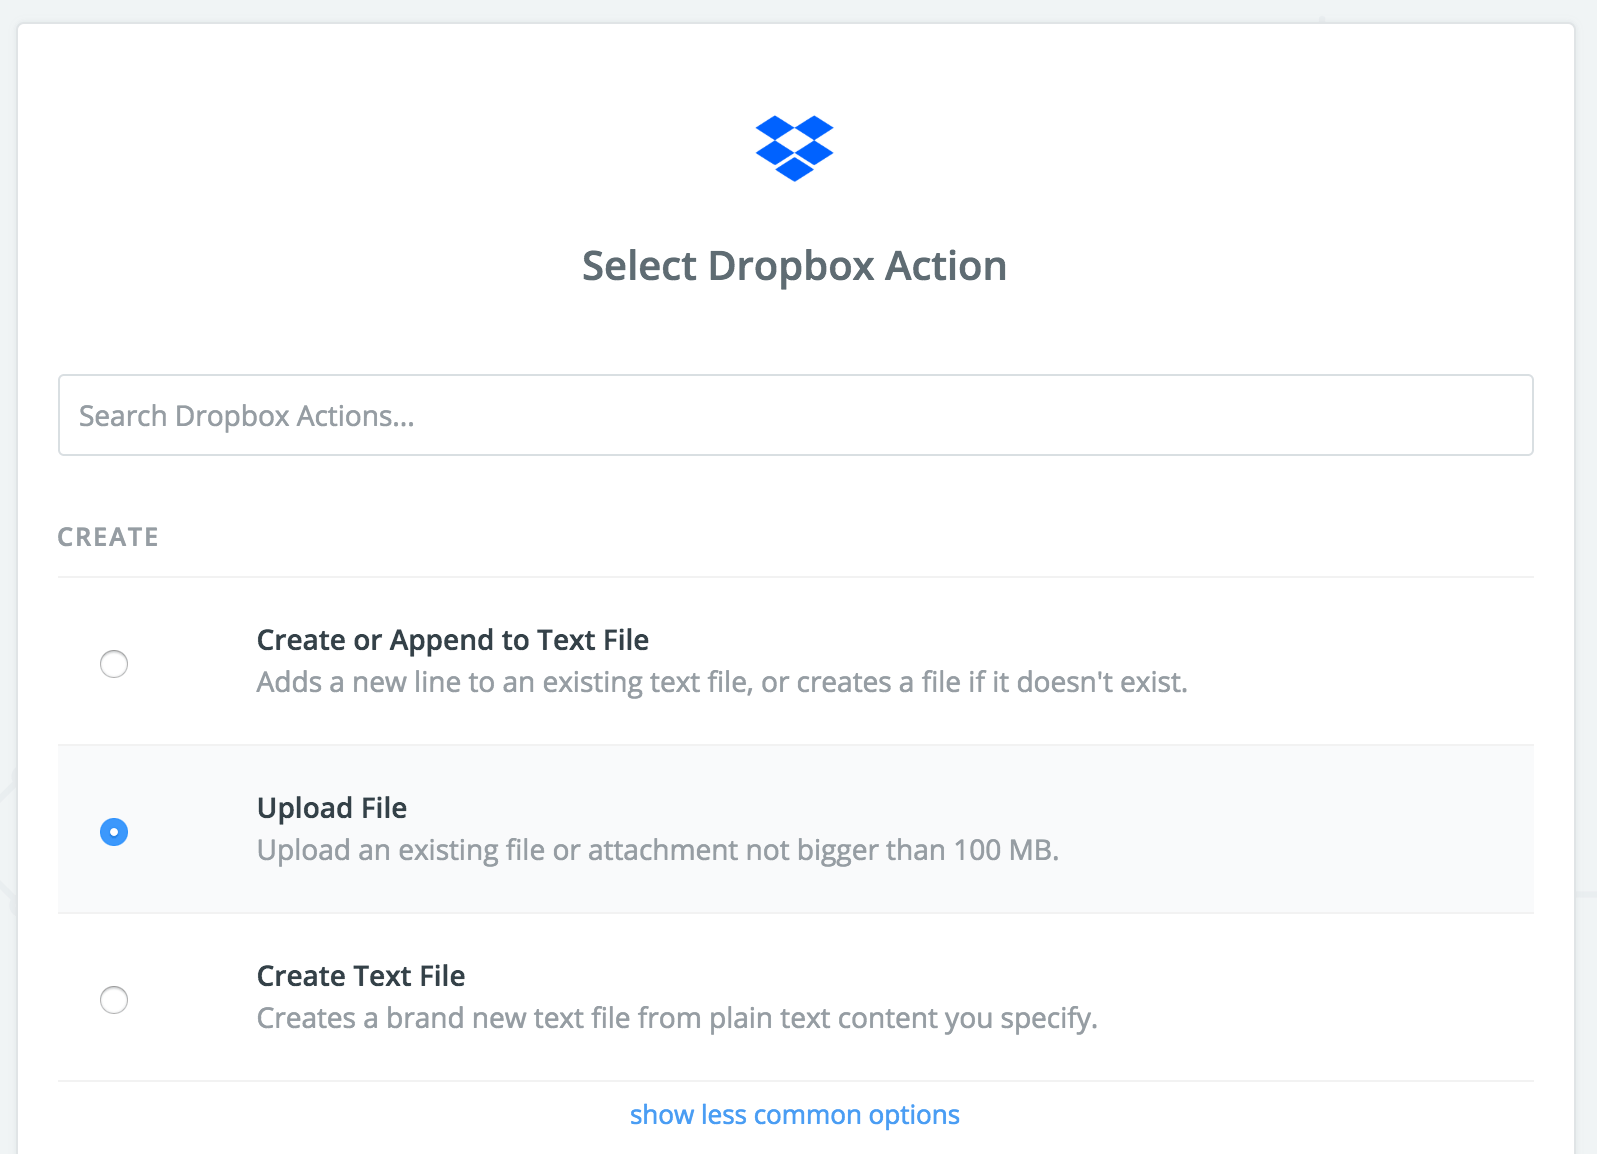
Then select "Upload File" for the Dropbox Action and click "Save + Continue"
-
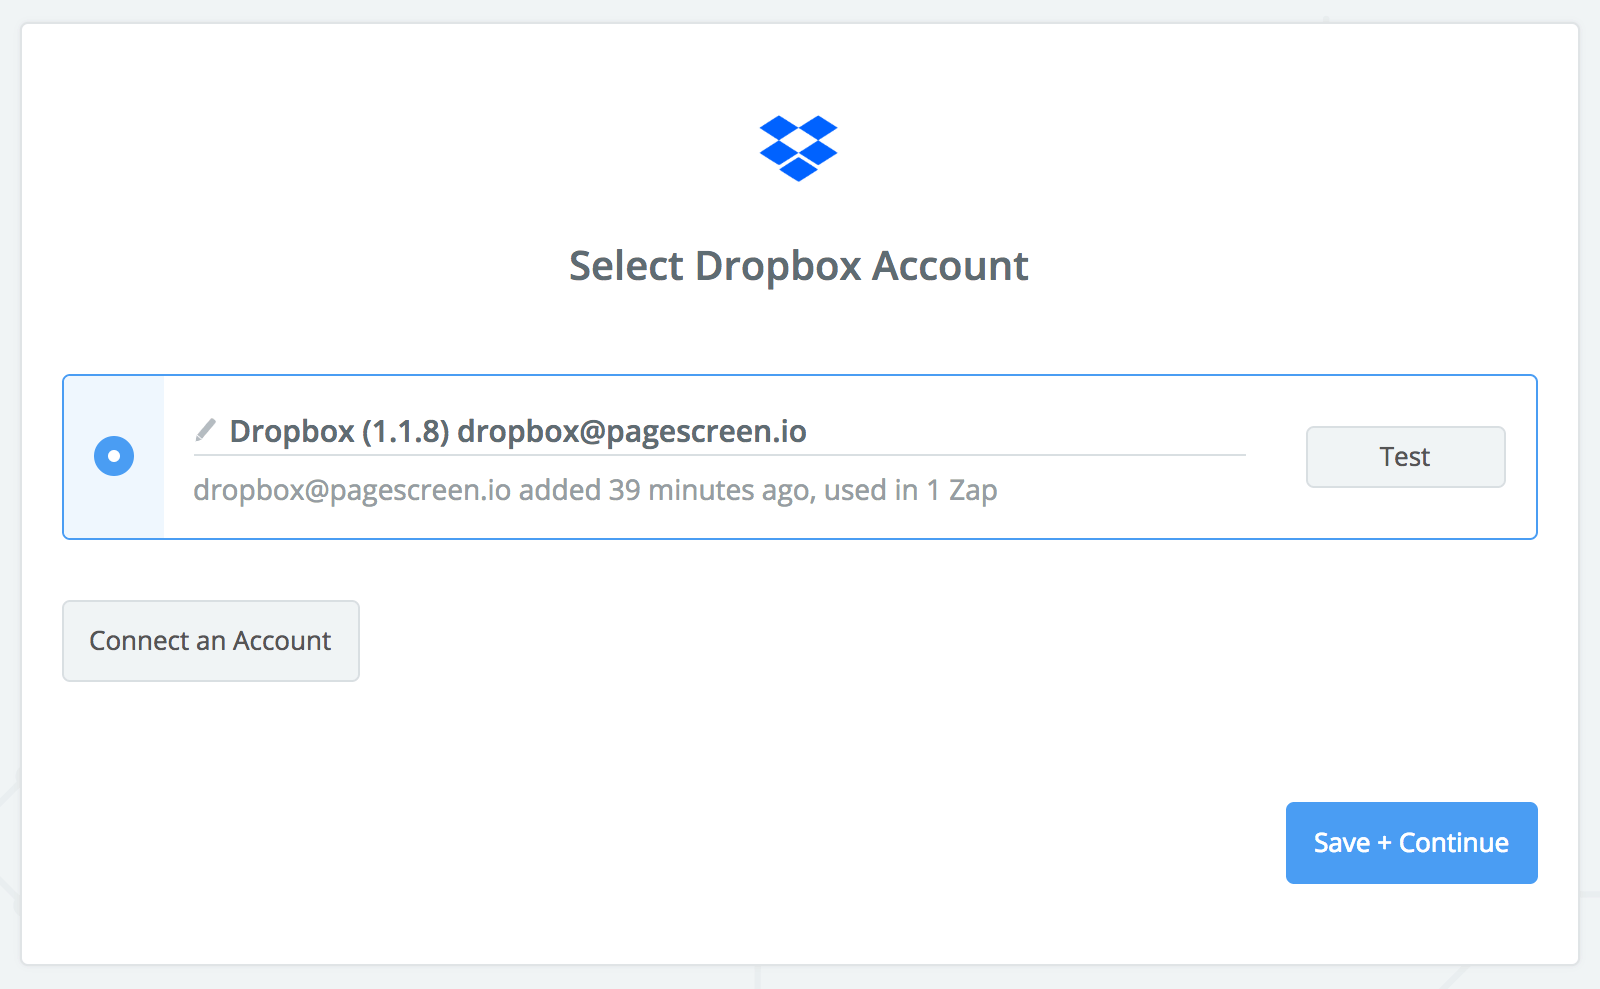
Connect and/or select your Dropbox account, then click "Save + Continue".
-
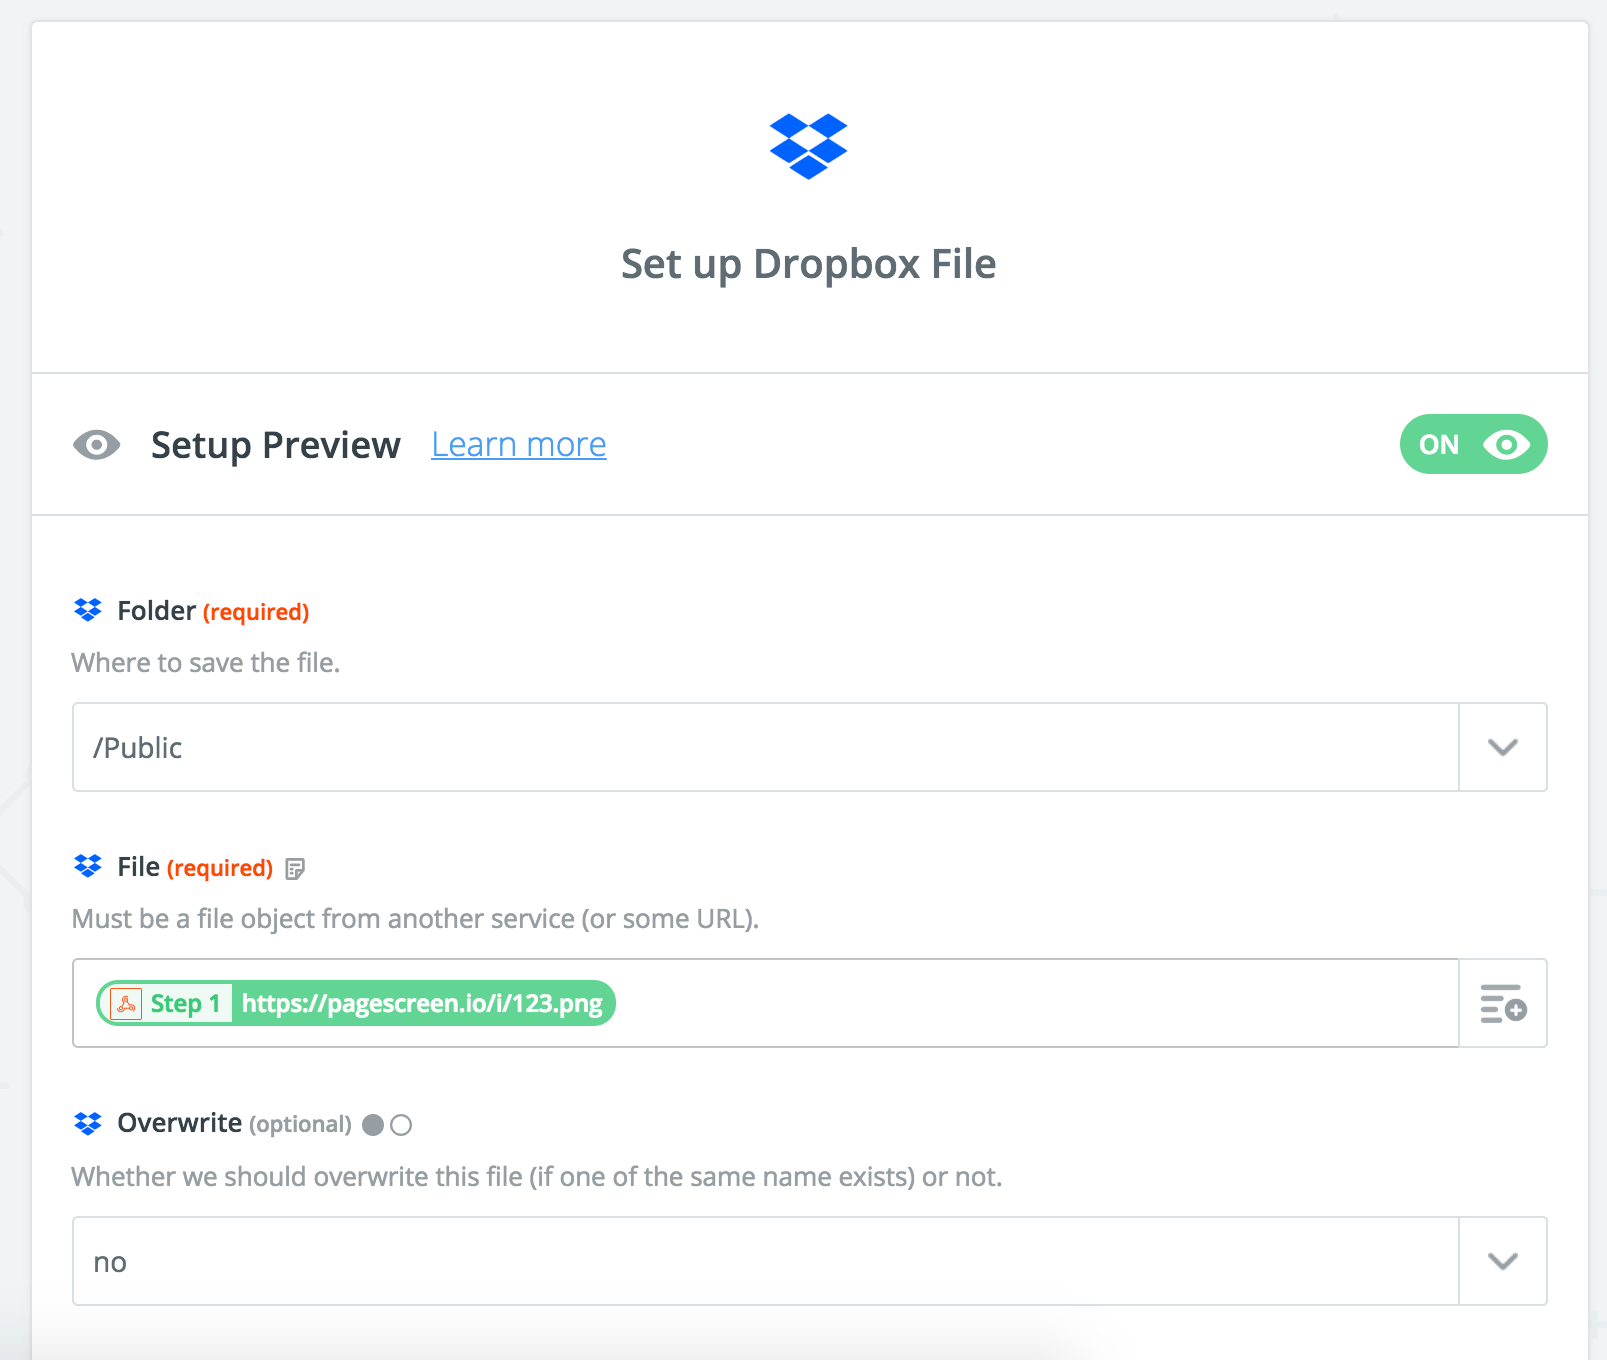
You are almost there!
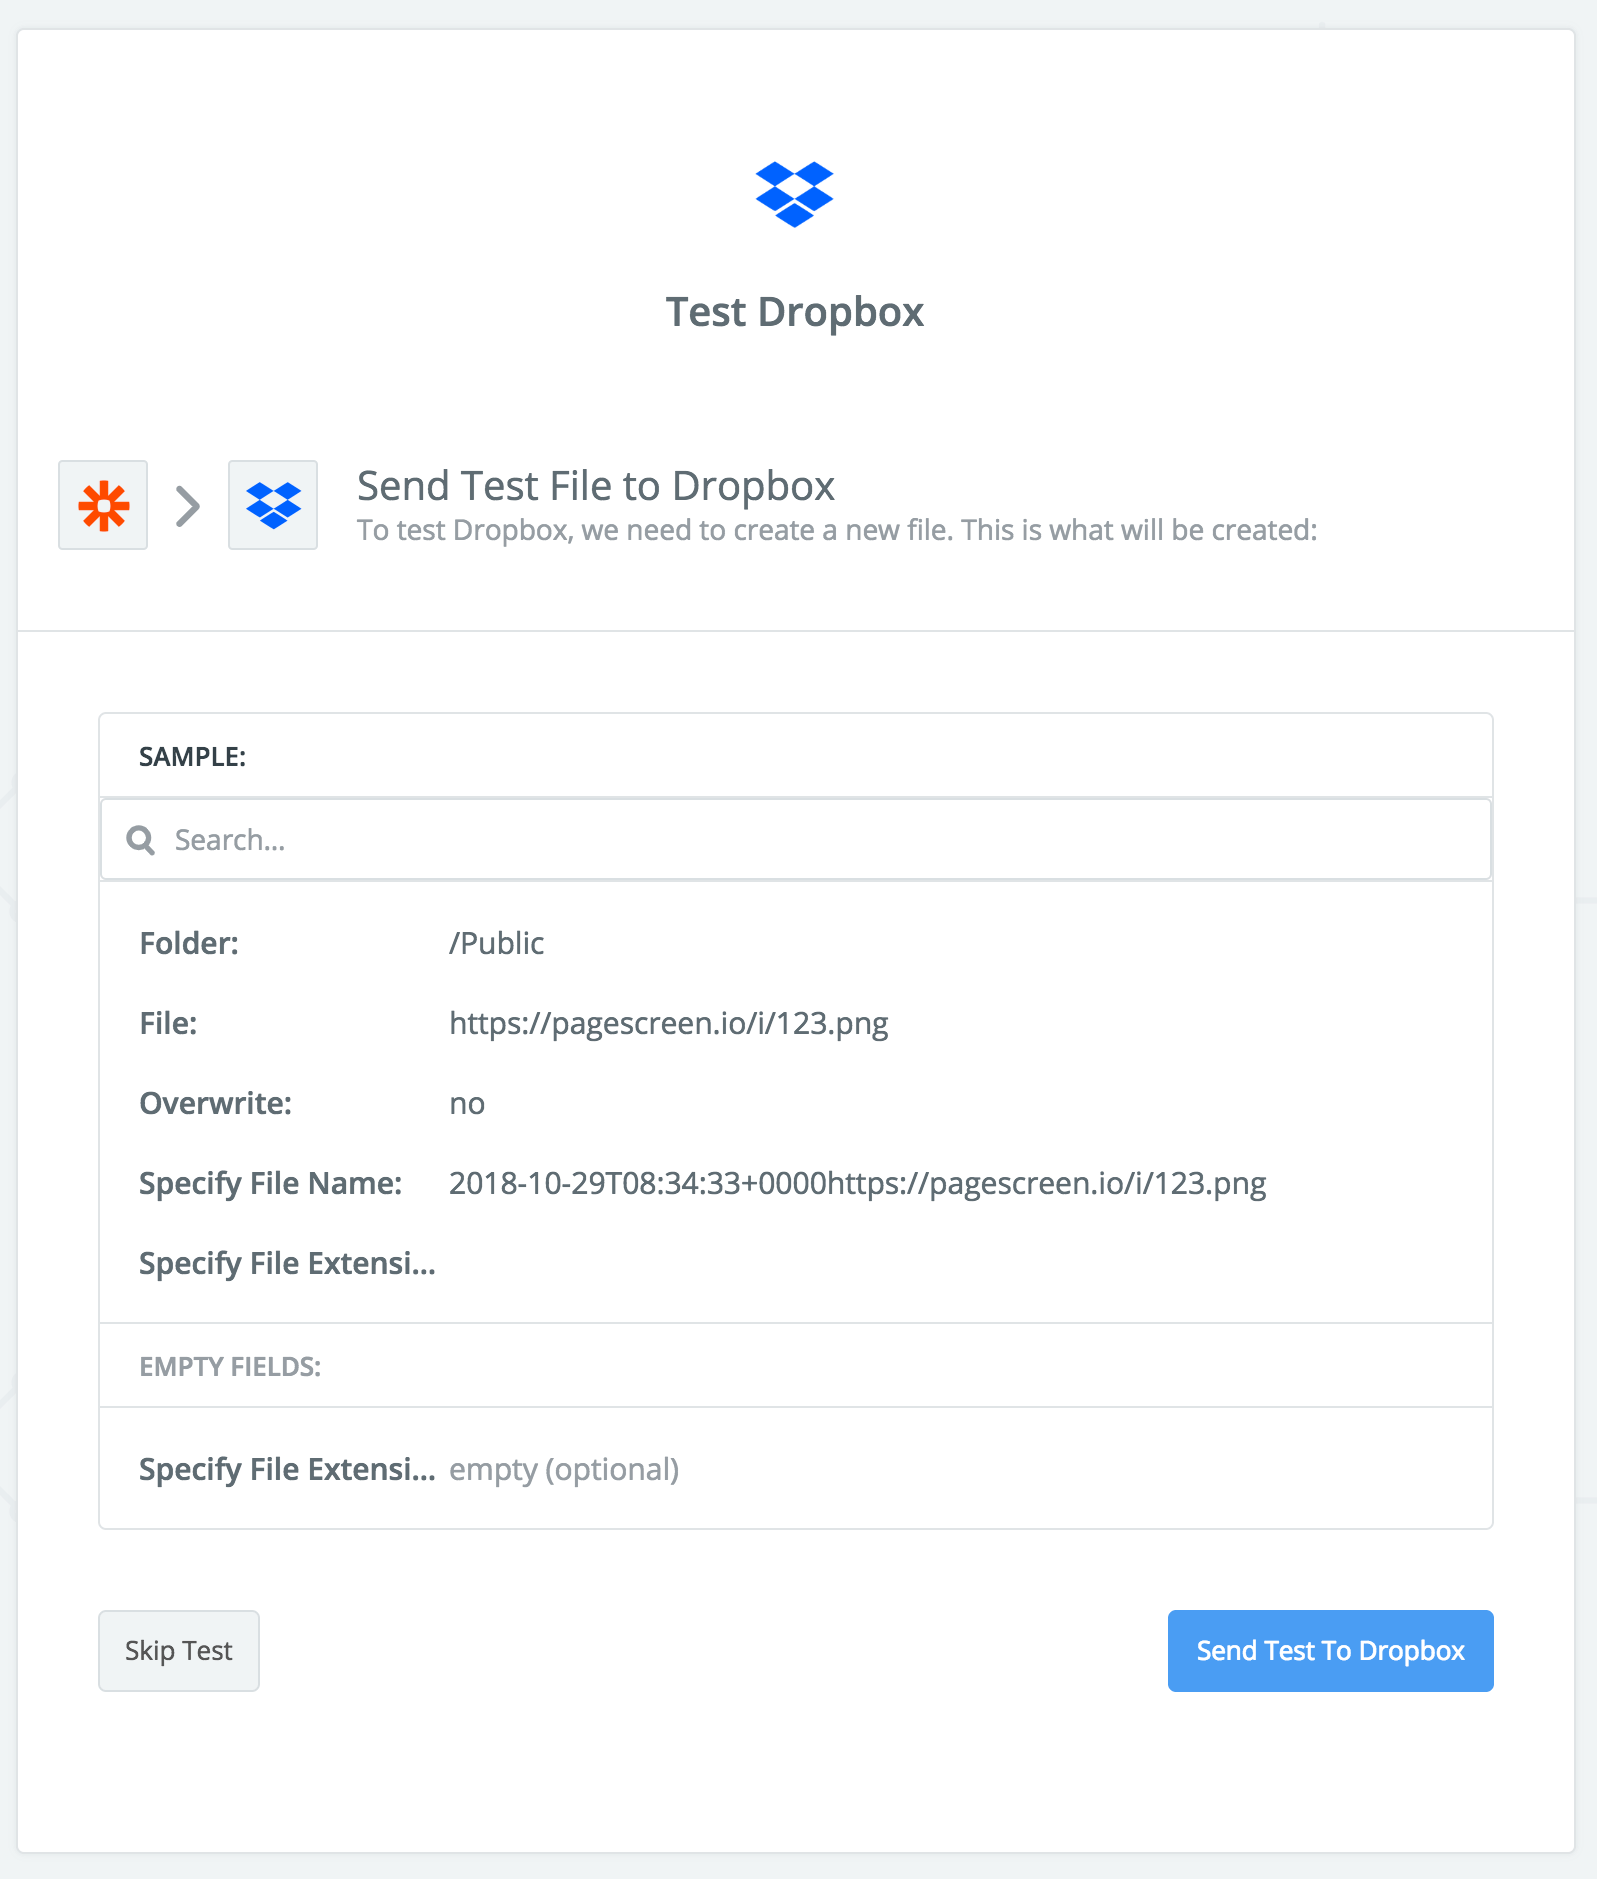
- select the desired folder where the screenshots should be saved on Dropbox.
- click on the icon on the right of the "file" input, then select the
image_permalinkfield. - click "Continue"
-
Zapier will now let you test the entire synchronisation. Click "Send test to dropbox" to see the magic happen.
-
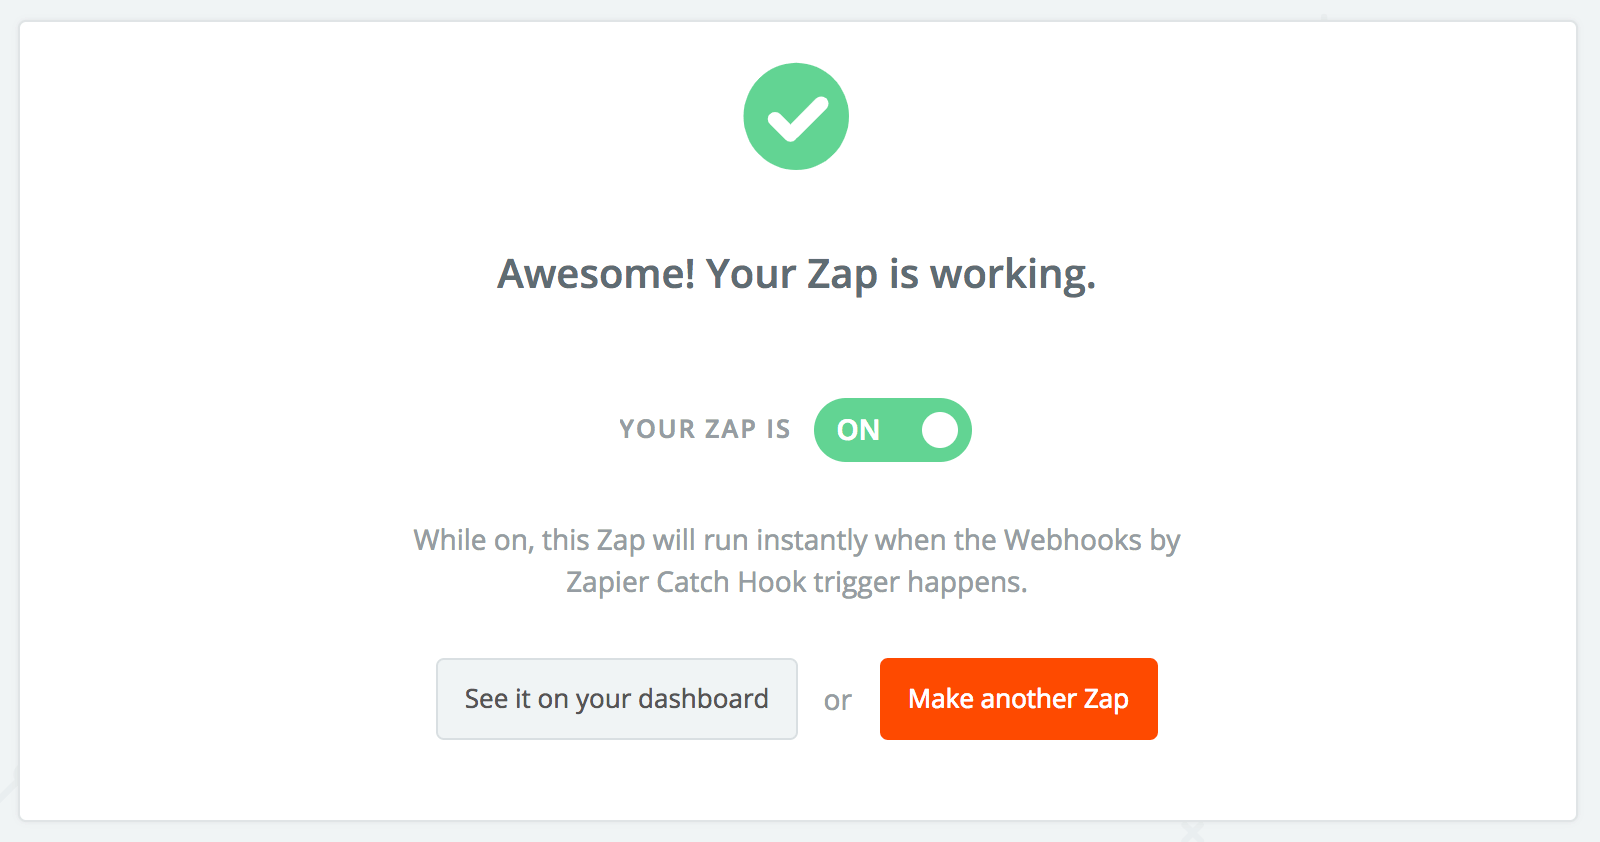
If all everything is done well, a new file will be created within your Dropbox folder. Then, click "Finish"

- You're all set! Don't forget to name you Zap and to activate it if needed.
Congrats!